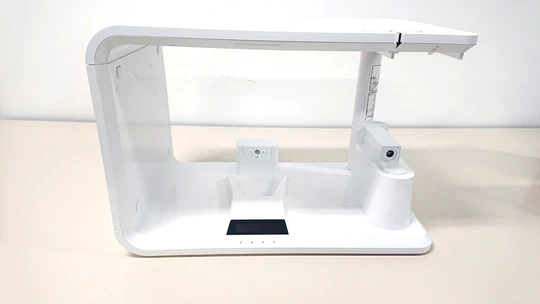
- Put the cabinet bottom on a steady and even surface.
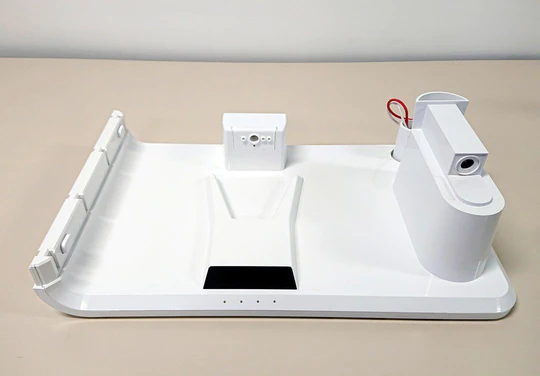
- Insert the side panel into the cabinet bottom. May need to press the buttons while inserting.
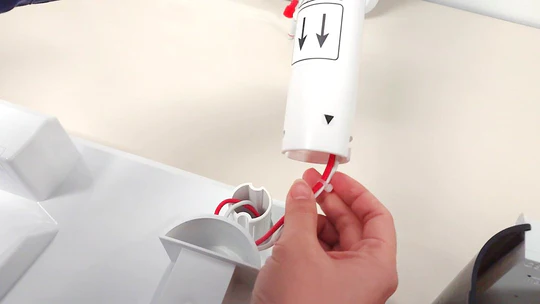
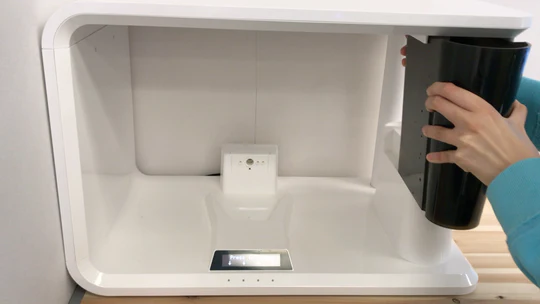
- Put the bottom connecting wires through the pillar and make sure the end of wires comes out from top of the pillar.
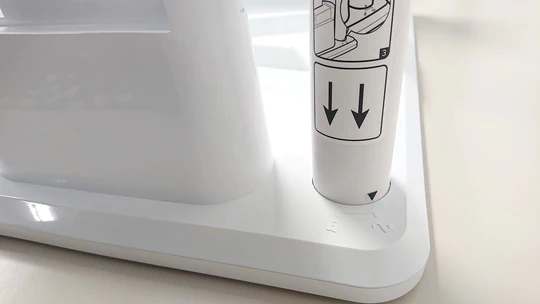
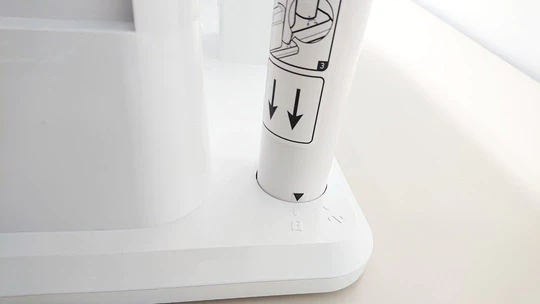
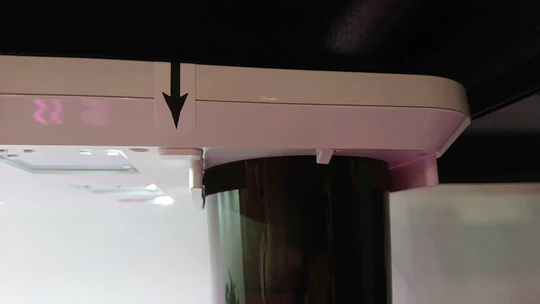
- Align the pillar with the arrow marking at the bottom. Then insert the pillar into the cabinet bottom. DO NOT turn the pillar.
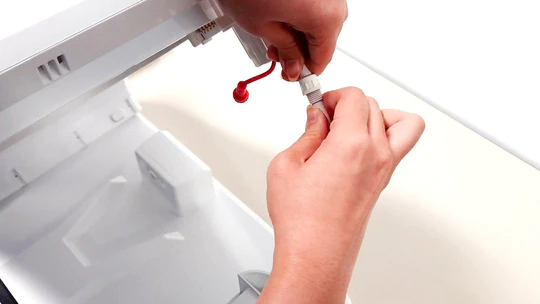
- Connect the top connecting wires and the bottom connecting wires, turn to lock. You may put the end of the top cabinet without connecting wire on bottom cabinet for easy installation. Ensure the colors are matched.
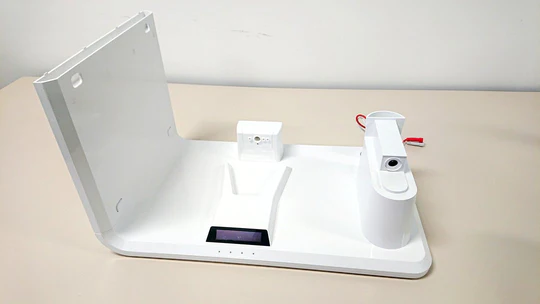
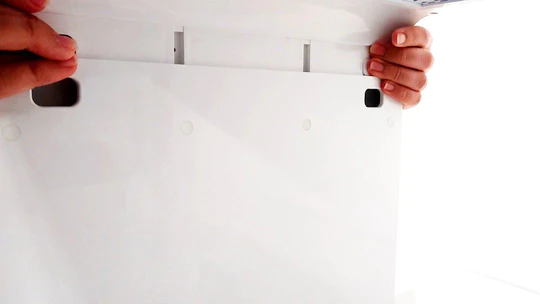
- Insert the cabinet top to the side panel. May need to press the buttons while inserting.
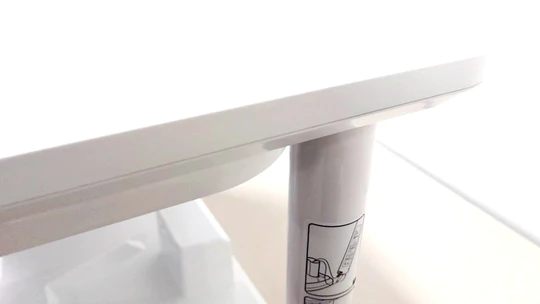
- Attach the cabinet top to the pillar.
- Turn the pillar to lock it in place.
- Assembly finished. Continue with Setup below.
Setup Guide: Assemble aspara Nature+ Smart Grower
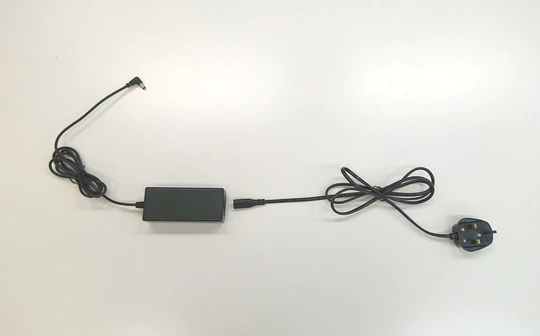
- Connect the power cord to the power adaptor. Plug into aspara first then the power outlet.
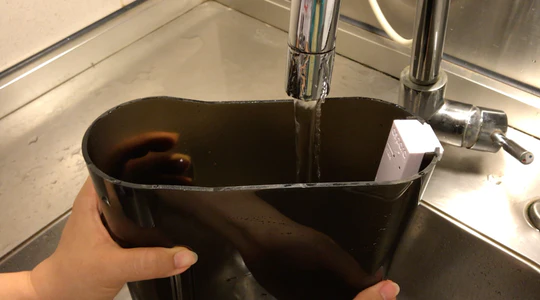
- Insert the sensing probe into the water tank.
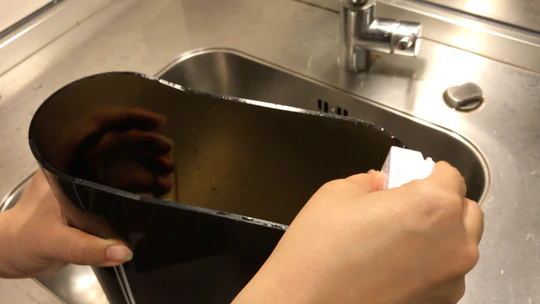
- Fill the tank to ‘max’ mark with tap water (if the tap water in your area is hard water, use distilled water).

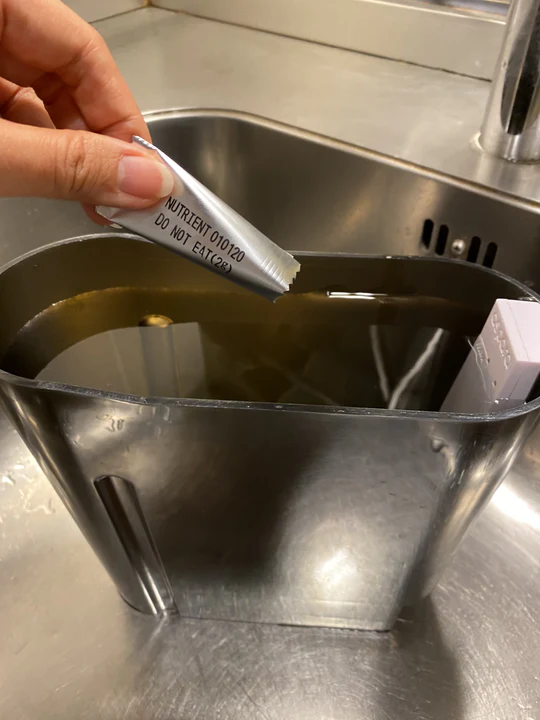
- Add 1 pack of nutrients into water in the tank. The nutrient packs can be found inside aspara seed kit.
- Insert the tank into the cabinet on the stand (the front part of the tank should be inline with the stand). Use both hands when insert. The light will be on and the control panel will show 'Water tank connected' when properly inserted.
- For aspara Nature+, make sure the tank lock (Red circle) comes out after tank inserted. (And you will need to press the tank release button (arrow) to release the tank after locked.)
- For aspara Nature+, make sure the tank lock (Red circle) comes out after tank inserted. (And you will need to press the tank release button (arrow) to release the tank after locked.)
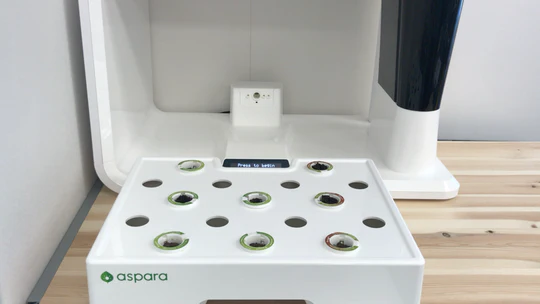
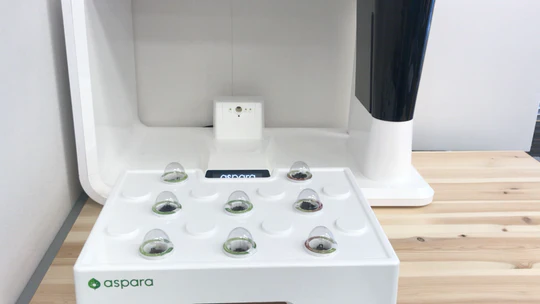
- Insert seed capsules according to seed kit setup.
- Place a germination dome over each seed capsules to keep seeds moist during germination.
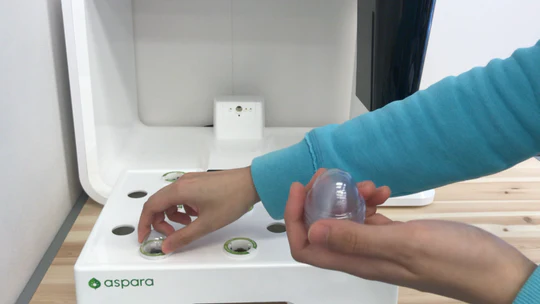
- Cover all capsules with the germination domes. You will need to remove them when you see sprouts growing in a few days or a week time (with 2 leaves appear or 1cm high).
- Cover any empty holes with a grow hole cover.
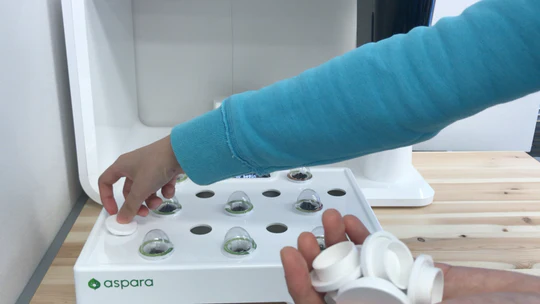
- Make sure all holes are covered to avoid bugs.
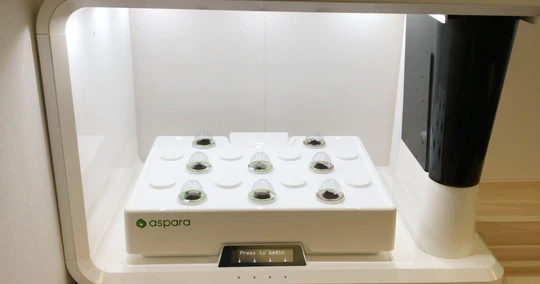
- Slide the grow tray into the cabinet and push the grow tray in firmly. When properly inserted, the light will be on and the control panel will show 'Grow tray connected'.

- Press any button to start planting online or offline. See How to connect for connection details.
- Add more water after water running finished to make sure your grower is fully filled with water.
Setup Guide: How to set up the smart grower
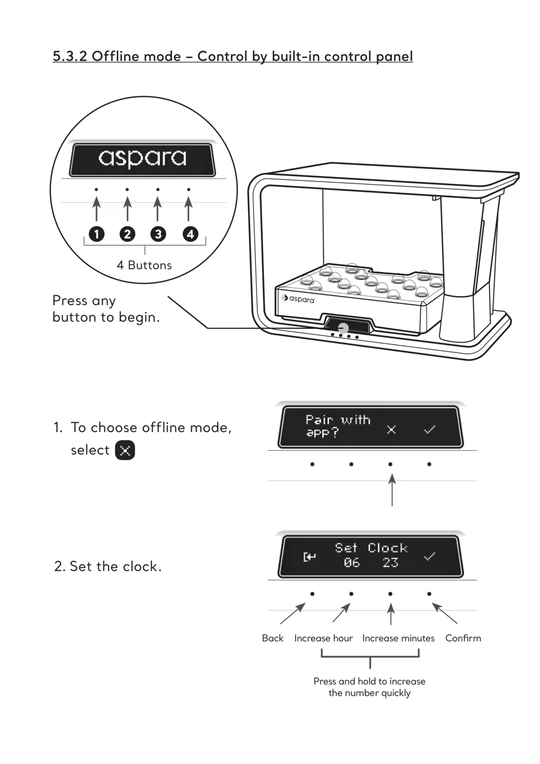
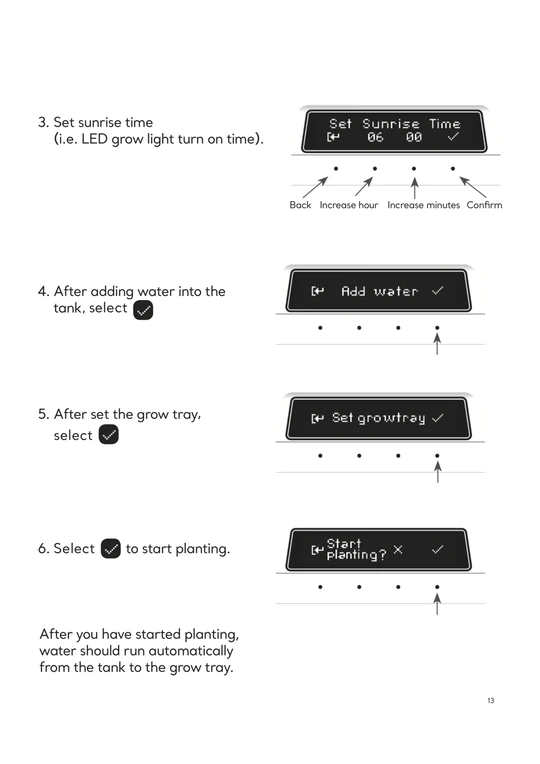
 Setup Guide: Start planting with offline mode
Select ‘Harvest’ in control panel.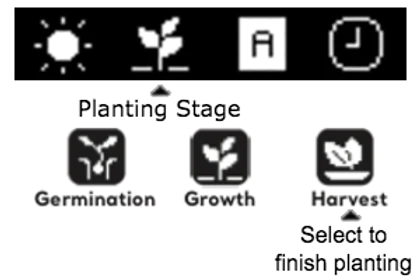
When you have planted over 60 days, we would recommend to replace all water in tank and grow tray with fresh water.
Please visit our blog for more details.
You can shift from offline to online mode only after planting program ended. See How to Connect to go online.
When going from online to offline mode, pin the “Reset” button and make your choice again. If you reset during planting mode, you will not be able to continue with your current planting data.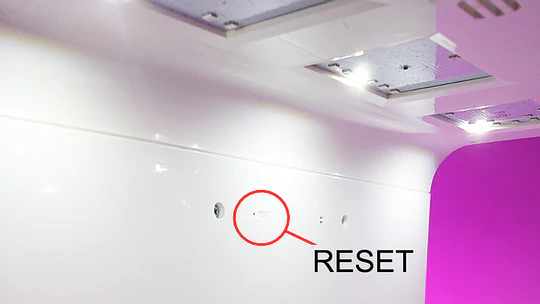
The appliance should be cleaned with hands and aspara cleaning function between each growing session or if it has not been used for a while. Make sure planting program is ended (finish planting) before cleaning.
Please visit our blog for more details.
- Make sure the plug to the power cord is plugged into an outlet and to the aspara.
- Reset your aspara to factory setting by gently inserting a pin/straightened paperclip to the reset pinhole.
aspara® Nature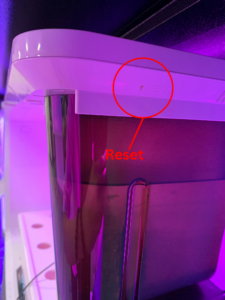
aspara® Nature+
- You can only adjust the lights when planting program has started.
- Start planting program by selecting “Yes” when “Start Planting?” is displayed on display screen or by selecting 'Plant' in my veg page after you have added your aspara in the aspara app (See App FAQs for more details on linking aspara to app).
- Light can be changed (from auto to white or dim light or off) by using control panel. Precise intensity adjustment can only be done in the app.
- aspara® has room for 16 seed capsules, you can grow up to 16 plants each time.
- To help your plants grow healthy and strong, we suggest the maximum number of seed capsules to be planted in 1 time:
Salad vegetables (e.g. kale, rocket): 8 capsules
Herbs: 12-16 capsules
Tomatoes: 4 capsules
Radishes: 8-12 capsules
Flowers: 12-16 capsules
aspara smart grower operates within a range of 100-240V (50-60Hz).
Please contact your nearest authorised service centre or email us at cs@grow-green.com
- aspara smart grower circulates water so that your plants can keep growing even when you are on holiday. We would recommend you to fill up the water tank and switch the planting speed to “Slow” when you are away. You can see the planting speed selection in control panel of your aspara in your app, unselect auto growing mode, the planting speed will then be available for selection when your plant is in growth mode. You can switch back to auto growing after your holiday.
- You can monitor and track the plant conditions instantly using the aspara app on your mobile device during your holiday.
- Program A, B and C are the pre-set planting programs available only when aspara is not paired with the app.
- If using the control panel, select program A/B/C according to the instructions on the seed kit box (you may need to extend the germination stage manually if your seeds have a longer germination period).
- If the program code is not indicated on the box, or if you are planting with Experimental Kits, we recommend selecting Program A for leafy greens, Program B for herbs, and Program C for fruits or edible flowers. This will ensure that each type of plant receives the specific care it needs for optimal results.
- More planting programs are available in the aspara app. When you are using the app, aspara smart grower will apply the specific program automatically according to the selected plant type.
Please visit our product page to find the corresponding seed kit. The seed kit setup procedure was at the bottom of the page.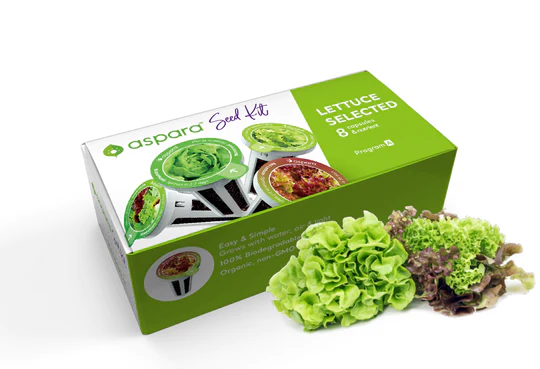
- Selected aspara seed kits are non-GMO and/or organic.
- We have different seeds supplied to different countries, for details, see label on your seed kit packing.
- Our seed capsules are 100% biodegradable.
- The basket is made of a plant polymer called PLA (polylactic acid), which is biodegradable and less harmful to the environment than traditional plastics.
- The time it takes for different seeds to germinate may vary.
- You can extend the germination stage using the aspara app or the control panel manually.
- If the seed capsules do not germinate within 3 weeks of planting and yet are within their use by date, please keep the grow basket, grow media and contact our Customer Support. You may need to provide the photo of the back of your original seed kit box and your purchase proof to an authorised aspara service centre. We will compensate your non-germinated seed capsule with a pack of seed (type depends on stock) or something of similar value (e.g. coupon).
- You can. However, we would recommend using aspara seed capsules as we have developed unique planting programs for our selected seeds.
- Also, we will have no guarantee on your germination and planting if you are using your own seeds. We are continue to develop different kind of seed perfect with aspara, you are welcomed to share your thought via our social media pages. Or you can also email us at cs@grow-green.com.
- Program A, B and C are the pre-set planting programs available only when aspara is not paired with the app.
- If using the control panel, select program A/B/C according to the instructions on the seed kit box (you may need to extend the germination stage manually if your seeds have a longer germination period).
- If the program code is not indicated on the box, or if you are planting with Experimental Kits, we recommend selecting Program A for leafy greens, Program B for herbs, and Program C for fruits or edible flowers. This will ensure that each type of plant receives the specific care it needs for optimal results.
- More planting programs are available in the aspara app. When you are using the app, aspara smart grower will apply the specific program automatically according to the selected plant type.
- Place your smart grower in an area with WiFi coverage, then:
- Log in

- Log in
- Sign up by pressing the “Sign Up” button, fill in your information and verify your account in the confirmation email (using the device with the aspara app installed); or
- Follow the instructions and sign in with your Facebook/ Google/ Twitter account
- Add device
- Add device
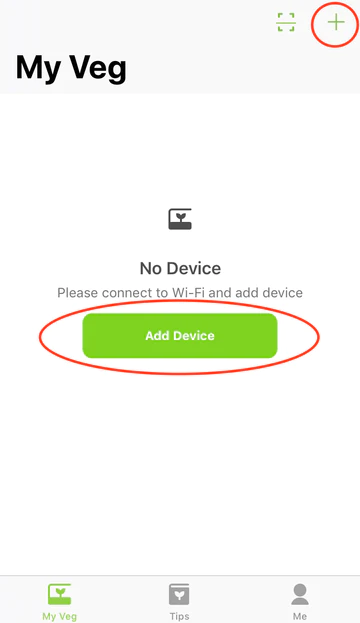
- Press the “Add Device” or "+" button at the top right corner
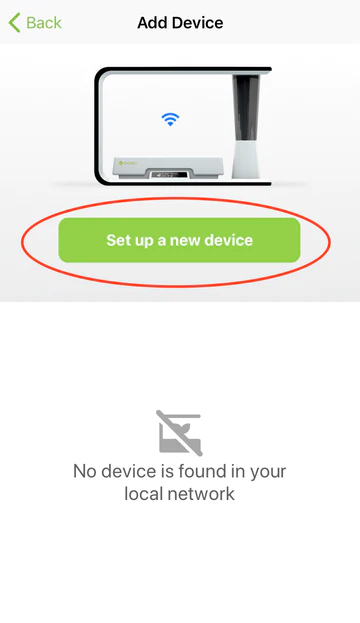
- Then press the “Set up a new device” button
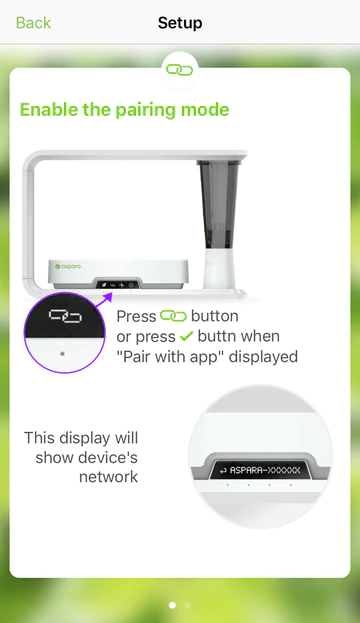
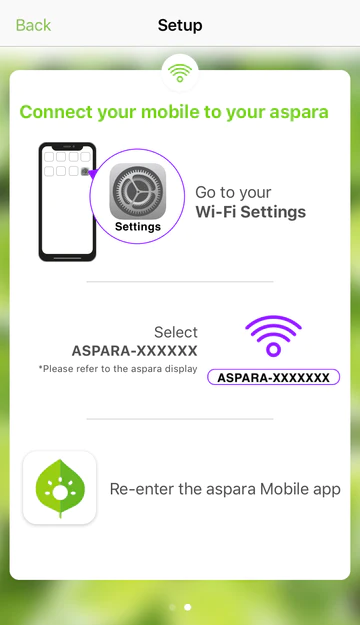
- Follow the setup guide to connect your device to your aspara
- You can simply search “aspara” in the app stores (iOS store or Google Play Store) of your device.
- aspara app requires iOS 10.0 or later / Android lollipop or later.
- aspara app is compatible with iPhone, iPad and most of the Android phone. It may not be compatible with some of the Android tablets, you can see the message when you access to the aspara app page in the app stores.
- aspara app is available to specific regions only. If you cannot download your aspara app, please contact cs@grow-green.com.
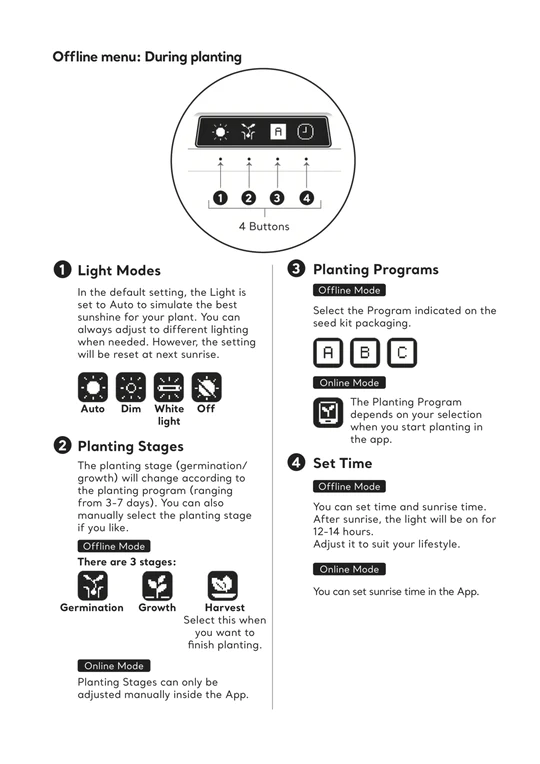
- Yes, you can grow your plants without the aspara app. Simply use the control panel for the offline mode.
- For the offline mode, you cannot fully control your aspara. You will need to choose your planting program (A, B or C). You can refer to top of the seed kit package for the desired planting program.
- The planting stage (germination/growth) will change according to the planting program (Range from 3-10 days). You can also manually select the planting stage if you would like to change.
- Please note you may need to manually extend the germination stage if your plant has not germinated after the germination stage. After your manual selection of planting stage, aspara will not change the stage automatically.
Yes, users can connect to multiple aspara smart growers with one aspara app.
- Open the aspara app and check if your aspara is shown on the my veg page.
- If no, press “Add device” on top right corner and connect your aspara to app.
- If you can find the aspara on app, check if the aspara is disconnected. Maybe your aspara is placed in area with weak wifi signal or your wifi network cannot connect to internet. You can check your aspara control panel and get some hints whether your aspara cannot connect to your wifi or your wifi cannot connect to internet.
- If you are sure your wifi signal is strong enough and your wifi is connected to internet, try unplug and replug your aspara.
- You are welcomed to email us at cs@grow-green.com if you have any enquiry.
Please download the aspara app before you get started. There are two ways for other users to connect to the smart grower:
- Connect to the Wi-Fi network
- Connect your phone to the Wi-Fi network that the aspara has already connected to.

- Click the “Add Device” or "+" button at the top right corner (on the My Veg page).
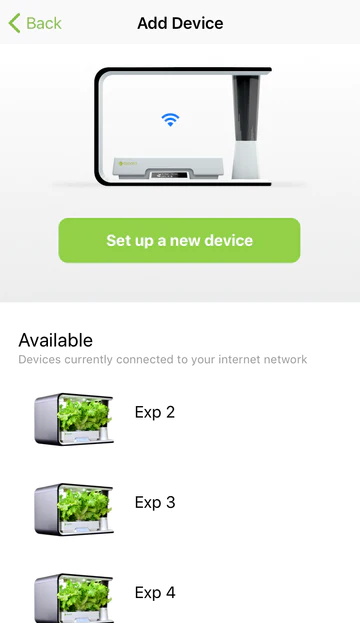
- Under "Available", you can find the devices that are currently connected to your internet network.
- Select the device you would like to link to your app.
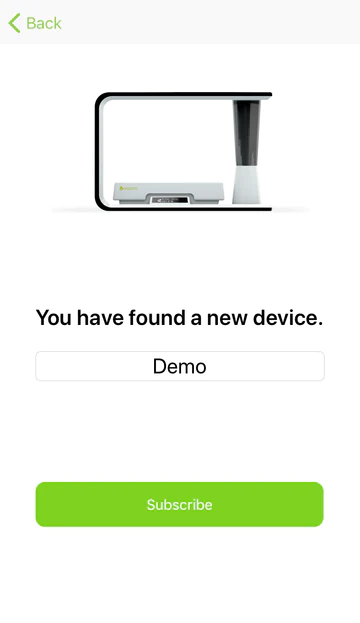
- Click "Subscribe".
NB: If you cannot find your aspara under "Available" (which may due to the settings of your router), please follow the instructions below (2. Sharing).
- Connect your phone to the Wi-Fi network that the aspara has already connected to.
- Sharing
- To share your aspara with other users, select the device on the "My Veg" page.
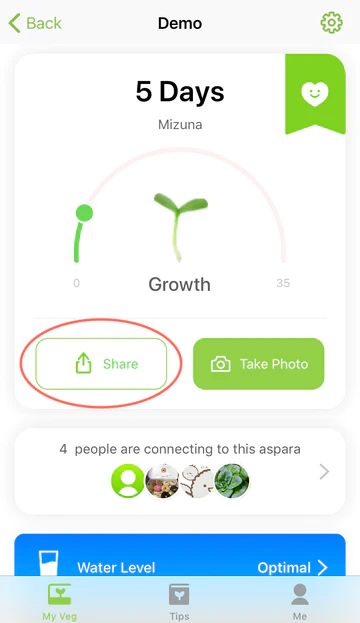
- Click "Share", then click "Share this Device".
- You can then send a link to other users.
- When the users click the link, they will be directed to the aspara app. They will also be asked to confirm the subscription to your device, click "OK" to confirm.
- To share your aspara with other users, select the device on the "My Veg" page.
NB: After adding the smart grower to the device list, all users will be able to monitor and control it remotely.
Please check if you have verified your account in the confirmation email (using the device with the aspara app installed).